

Picture this: your campaign is live, budget is burning, and someone asks, “Are we actually tracking conversions on this?” You check. Half the events are missing. The developer who was supposed to add the tracking code is three sprints deep into something else.
This happens constantly. And honestly, it shouldn’t.
Codeless conversion tracking is the fix for exactly this situation. It lets you set up, test, and manage conversion events yourself, without touching the codebase, without filing a ticket, and without waiting two weeks for a deployment window. If you’re a marketer running paid campaigns or managing analytics, this is one of those things you want to understand properly, not just skim.
This article walks through how codeless conversion tracking actually works under the hood, which tools give you the most control, step-by-step setup for GTM, GA4, and Meta, and where the whole approach starts to break down. That last part matters more than most people admit.
Table of Contents
What Is Codeless Conversion Tracking?
Codeless conversion tracking is the ability to record user actions on a website as conversion events without writing or deploying custom JavaScript yourself. You configure it through a visual interface, a point-and-click tool, or an automated detection layer that already knows how to read your page.
Worth being clear about something: there’s still code running. It just isn’t code you wrote. The tag management system or tracking platform generates and deploys it for you. The “codeless” part means you never have to open a text editor or hand anything to a developer.
For most day-to-day conversion tracking needs, that’s exactly enough.
How Does It Actually Work Under the Hood?
Most people set up codeless tracking without really knowing what’s happening beneath the surface. That’s fine until something breaks. Then you’re stuck.
Here’s the short version. Codeless tools rely on three mechanisms, and knowing which one your setup uses tells you a lot about where it might fail.
DOM listening is the most common. DOM stands for Document Object Model, which is basically the live structure of your web page. A DOM listener watches for specific interactions on that structure, like a button click or a form submission, and fires a tag the moment one of those interactions matches a rule you’ve defined. You tell the tool: fire when someone clicks a button with the text “Get Started.” It does the rest.
CSS selector matching is similar, but instead of watching for text, it watches for an element identified by its HTML class, ID, or tag. You point at the element, and it tracks it. No code needed from you.
URL-based triggers are the simplest. If reaching a page like /order-confirmed or /thank-you is your conversion signal, you just set a trigger on that URL. Clean, reliable, and honestly underused.
Google Tag Manager’s trigger builder, GA4’s Enhanced Measurement, and Meta’s Event Setup Tool all run on versions of these three. Once you know that, the setup steps start to make a lot more sense.
Codeless conversion tracking captures user actions as events without requiring manual code deployment. It works through DOM listening, CSS selector matching, or URL-based triggers configured inside tag management or analytics platforms. The code still executes, but it’s generated and deployed by the tool, not written by the marketer or developer.
Which Tools Support Codeless Conversion Tracking?
There are a few worth knowing well, and a handful worth knowing exist.
Google Tag Manager
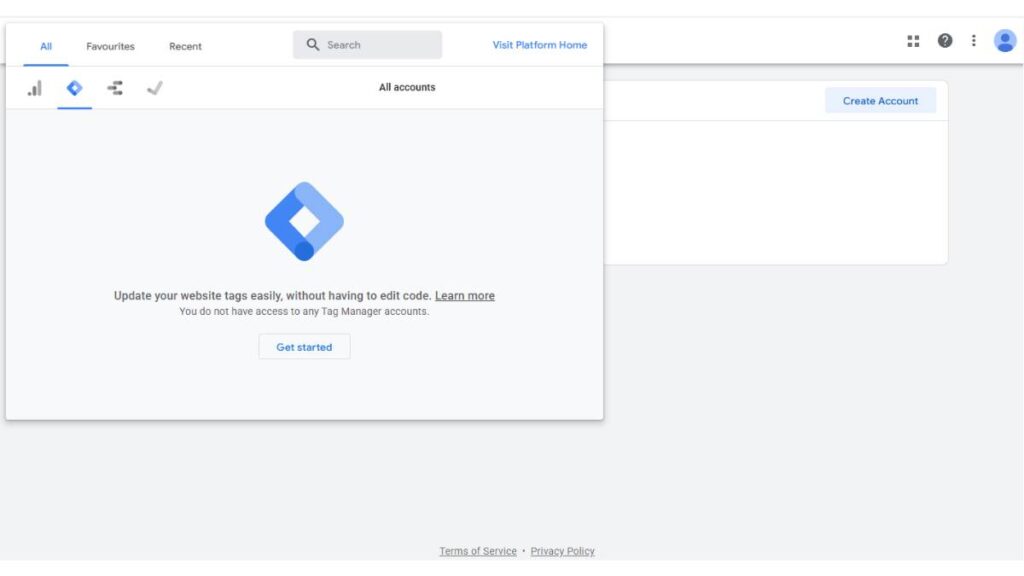
Google Tag Manager (GTM) is the most flexible option for codeless conversion tracking. You build triggers using a visual interface, publish changes without touching the site’s code, and debug in real time with the Tag Assistant Chrome extension. The one-time setup requires a developer to add the GTM container snippet to your site’s <head> and <body>. That’s literally it for dev involvement. Everything after that is yours.
GTM works well for almost any tracking scenario: clicks, form submissions, scroll depth, video interactions, and custom events. It’s the tool most performance marketers eventually end up in, whether they planned to or not.
Google Analytics 4 Enhanced Measurement
GA4 has a feature called Enhanced Measurement that auto-tracks several common events the moment you turn it on: page views, scroll depth, outbound clicks, site searches, video engagement, and file downloads. No GTM, no code. You toggle it on from the GA4 admin panel and it just… works.
For a simple blog, a lead gen landing page, or any site where you’re mostly tracking engagement events, Enhanced Measurement alone covers a lot of ground. It’s a reasonable place to start.
Meta’s Event Setup Tool
Meta lets you configure pixel events directly through Events Manager without touching your site’s code. You open their tool, type in your URL, and your site loads inside an embedded browser. You click the button you want to track, tell Meta what event type it represents (Lead, Purchase, ViewContent, and so on), and save. Meta writes the rules. Your existing Meta Pixel fires them.
It’s surprisingly capable for a point-and-click tool. The limits show up when you need custom events with custom parameters, but for standard campaign tracking, it covers most situations.
A Few Others Worth Mentioning
Heap Analytics takes a different approach entirely: it auto-captures every user interaction retroactively, so you can define conversions after the fact. Useful if you didn’t know what to track when you launched. Shopify merchants have built-in purchase and checkout tracking that requires no manual pixel configuration beyond installing the Google or Meta sales channel. And Segment has a no-code event builder if you’re already using it as a CDP.
How to Set Up Codeless Conversion Tracking in Google Tag Manager
This is the most useful setup you can learn. Once you’ve done it for a button click, you can apply the same logic to almost anything on your site.
The assumption here is that your GTM container is already installed. If it isn’t, get a developer to add the snippet. One task, 10 minutes on their end, and then you don’t need them again for any of this.
Step 1: Open GTM and go to your Workspace. Log in to tagmanager.google.com, select your account and container, and land on the Workspace tab.
Step 2: Turn on Click Variables. Go to Variables, click Configure, and under the Clicks section, enable: Click Classes, Click ID, Click Text, Click URL, and Click Target. These variables let GTM read properties of any element on the page when a user clicks it. They’re off by default for some reason.
Step 3: Create a Click Trigger. Go to Triggers, click New, and select “All Elements” as the trigger type. Under “This trigger fires on,” choose “Some Clicks.” Add a condition. A practical example: Click Text contains “Book a Demo.” This trigger fires every time someone clicks any element containing that text. Save it.
Step 4: Create a Tag. Go to Tags, click New, and choose your tag type. If you’re sending the event to GA4, select Google Analytics: GA4 Event. Name your event (something like book_demo_click), attach the trigger you just created, and save.
Step 5: Preview and test before you publish. Hit Preview in the GTM toolbar. Google Tag Assistant opens a live version of your site. Click the button. Check the debug panel. If the trigger fired and the tag sent, you’re good. Go back and publish your container.
The whole thing takes about 20 minutes the first time. Faster after that.
Setting up codeless conversion tracking in Google Tag Manager involves enabling click variables, building a trigger based on click text or element ID, attaching a GA4 or ads tag, and publishing. No code changes to the website are required beyond the initial GTM container installation.
How to Track Conversions Without Code in Google Analytics 4
GA4 gives you two paths, and they’re both genuinely useful.
Enhanced Measurement for automatic events: Go to Admin, open Data Streams, select your web stream, and click the Enhanced Measurement toggle. From there, you can turn on scroll tracking, outbound click tracking, file downloads, and a few others. These start working immediately. No GTM required, no code, nothing else.
Marking events as conversions: This is slightly underused. Any event GA4 is already collecting can be marked as a conversion. Go to Admin, open the Events section, find the event, and flip the “Mark as conversion” toggle. That’s it. The event now appears in conversion reports and can be imported into Google Ads.
For Shopify, WooCommerce, and Squarespace, GA4 integrates natively. Shopify merchants install it through the Google and YouTube channel app, and purchase events flow automatically. No developer needed.
Codeless Meta Pixel Events: What’s Possible
Meta’s Event Setup Tool is more capable than it looks from the outside. Here’s how to use it.
Step 1: Go to Events Manager in Meta Business Suite. Select your Pixel and click “Open Event Setup Tool.”
Step 2: Type in your website URL. Meta loads your site inside an embedded browser window within Events Manager. It feels a bit strange the first time.
Step 3: Navigate to the page with the element you want to track, then click it. Meta asks you to confirm the event type: Lead, Add to Cart, Complete Registration, Purchase, and so on.
Step 4: Save and confirm. Meta writes the event rules against your existing Pixel. Nothing is deployed to your site directly.
The honest limitation: this works well for Meta’s standard event types. Custom events with custom parameters, like passing a specific order value or a product category, still need code. But for most performance marketing setups, the standard set covers the conversions that actually feed your campaign optimisation.
Where Codeless Tracking Falls Short
This part gets skipped in most write-ups on this topic. It shouldn’t be.
Single-page applications are a real problem. Sites built with React, Angular, or Vue don’t always trigger true page loads when users navigate between views. URL-based triggers can fail silently. GTM has workarounds, but they involve History Change triggers and sometimes custom JavaScript. If your site is a SPA with complex routing, a developer is going to be involved regardless of what the tool promises.
Dynamic elements break selector-based triggers. If a CMS update, a design change, or an A/B testing tool changes a button’s class name or text, your trigger stops firing. GTM doesn’t warn you. The conversion just disappears from your reports until someone notices the numbers look off. For teams running frequent site updates, this is a real maintenance issue.
Server-side events can’t be captured client-side. Full stop. Subscription renewals, payment completions routed through third-party gateways, backend form handlers, any event that happens off your site or on a server, codeless client-side tools can’t see them. This requires server-side tagging or a Conversion API integration.
And then there’s the accuracy issue. Client-side tracking gets hit by ad blockers, Safari’s ITP (Intelligent Tracking Prevention), and iOS consent prompts. According to a 2024 Elevar study, pixel-only tracking misses 20-30% of purchase events on Shopify stores due to these factors. That’s a significant gap if you’re making budget decisions based on those numbers.
The point isn’t that codeless tracking is bad. It’s that it isn’t the whole picture. For small accounts and early-stage setups, it’s absolutely fine. As spend scales, pairing client-side codeless tracking with a Conversion API or server-side event layer is how you close the accuracy gap. The two approaches complement each other; they’re not either/or.
Codeless conversion tracking has meaningful limitations on single-page applications, with dynamically rendered elements, and for server-side events like payment completions. Client-side tracking tools also face accuracy gaps from ad blockers and browser privacy restrictions, which can cause 20-30% underreporting on high-traffic e-commerce sites.
Conclusion:
Codeless conversion tracking removes the biggest actual bottleneck most marketing teams deal with: needing a developer every time you need to track something. With GTM, GA4, and Meta’s Event Setup Tool, you can get your core conversion events firing in an afternoon. Not a sprint. An afternoon.
But don’t let how easy the setup is make you overconfident about the data. Client-side tracking alone misses a real share of conversions on most sites, and that gap gets more expensive as your ad spend grows. The goal is to set up codeless tracking as your foundation, understand its limits, and build server-side safeguards as your needs grow.
FAQs:
What is codeless conversion tracking?
Codeless conversion tracking is setting up and managing conversion events on a website without writing or deploying custom JavaScript. You configure tracking through a visual interface or an automated detection tool. Platforms like Google Tag Manager, GA4 Enhanced Measurement, and Meta’s Event Setup Tool make this possible for most standard conversion scenarios.
Is Google Tag Manager really codeless?
Mostly, yes. GTM requires a one-time installation of its container snippet, which a developer adds once. After that, all tag and trigger configuration happens inside GTM’s interface with no further code changes. For most marketing teams, that effectively makes it codeless for day-to-day use.
What’s the difference between codeless and no-code tracking?
The terms are used interchangeably in most contexts. Both mean you’re not manually writing the tracking code. Some people draw a distinction where “codeless” refers specifically to not writing event snippets, while “no-code” refers to a broader category of tools replacing developer work. In practice, they describe the same thing when it comes to conversion tracking.
Can you track e-commerce purchases without code?
On Shopify, WooCommerce, and Squarespace, yes. These platforms have native GA4 and Meta Pixel integrations that handle purchase tracking automatically. For custom checkout flows or third-party payment gateways like Razorpay or PayU, purchase confirmation usually needs a developer to add event code or set up a server-side integration.
How accurate is codeless conversion tracking?
It depends on your setup. URL-based triggers on confirmed thank-you pages are reliable. Click-based triggers can break with site changes. More broadly, all client-side tracking is affected by ad blockers, iOS privacy updates, and browser restrictions. A 2024 Elevar report found up to 30% underreporting on Shopify purchase events using pixel-only tracking, which is a big gap if you’re using that data to make decisions.
Do you still need a developer for codeless tracking?
For standard setups, you need a developer once to install the GTM container snippet. Everything after that is yours. If your site is a single-page application, has complex routing, or needs server-side tracking, you’ll need developer input beyond the initial install.
What events can’t be tracked without code?
Server-side events like subscription renewals, payment gateway completions, and backend form processing can’t be captured by client-side codeless tools. Dynamic elements that change class names or button text can also break trigger matching. And custom events with non-standard parameters generally still need code.
Is codeless tracking good enough for paid advertising?
For early-stage campaigns and smaller accounts, yes. As spend scales and attribution accuracy matters more, you’ll want to pair it with Conversion API (CAPI) or server-side tagging to recover events lost to ad blockers and browser restrictions. The two approaches work together.
Which should beginners start with: GTM or GA4 Enhanced Measurement?
Start with GA4 Enhanced Measurement if you just need scroll depth, outbound clicks, and basic page-level events. Move to GTM when you need to track specific buttons, form submissions, or anything requiring custom trigger conditions. Most teams end up using both.